OCR 字符检测
例程实验效果
本节我们来学习一下使用K230实现OCR字符检测的功能。
例程代码在【 源码汇总 / 09.Scene / 01.ocr_det.py 】
我们打开这一节的代码(或复制下面的完整代码),点击运行按钮,然后用摄像头对准有文字存在的地方
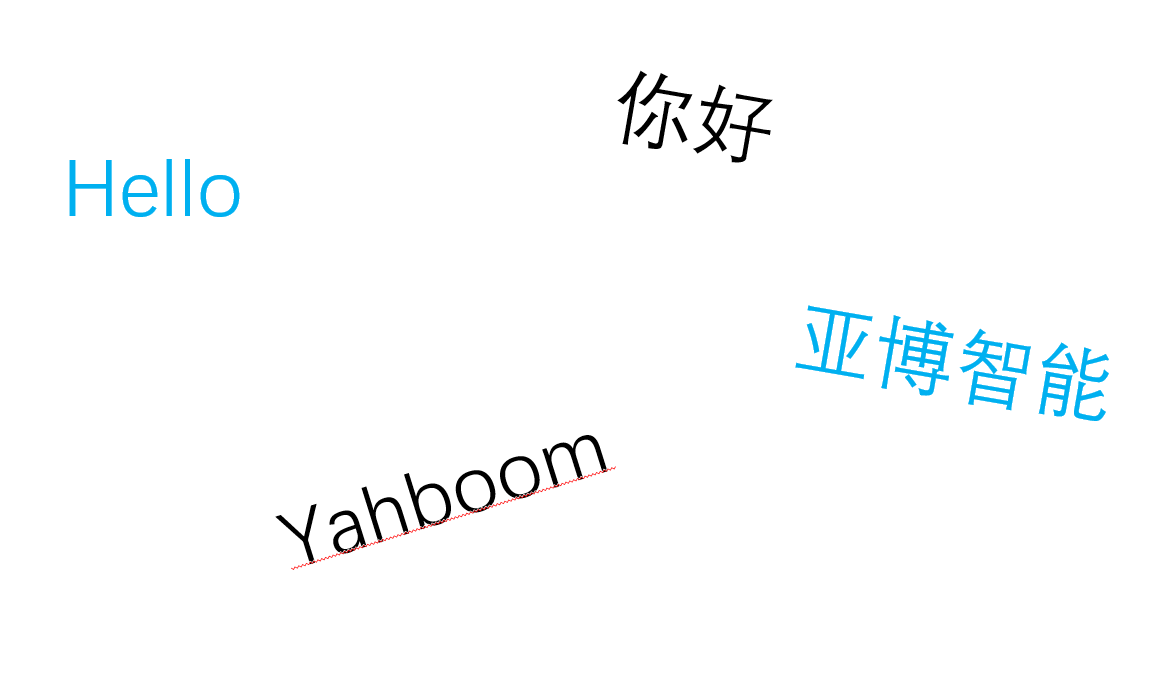
【原图】
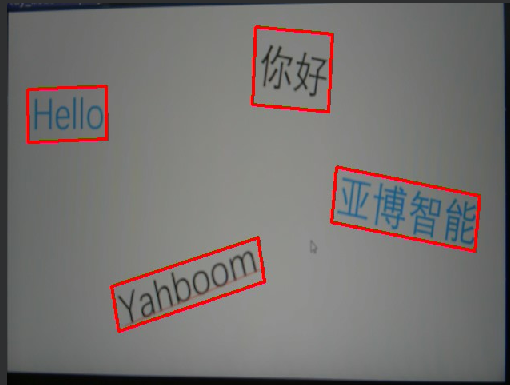
【检测效果】
已添加串口输出功能
检测到OCR字符串后会发送如下格式的串口输出
$x1,y1,x2,y2#
其中'$'代表数据的开头, '#'代表数据的结尾
x1,y1,x2,y2是OCR一条边线的位置(分辨率为640*480)
- 每次识别到一个OCR字符串会分四次输出四条边线
代码讲解
代码结构
初始化阶段/Initialization Phase:
- 加载模型/Load model
- 设置参数/Set parameters
- 初始化检测器/Initialize detector
- 初始化 AI2D 处理器/Initialize AI2D processor
预处理流程/Preprocessing Flow:
- 配置预处理操作/Configure preprocessing
- 图像填充/Padding
- 图像缩放/Resize
推理流程/Inference Flow:
- 运行检测/Run detection
- 后处理结果/Postprocess
- 获取检测框/Get detection boxes
绘制效果流程/Drawing Flow:
- 清空显示/Clear display
- 绘制检测框/Draw detection boxes
- 更新显示/Update display
退出流程/Exit Flow:
- 退出演示/Exit demo
- 清理资源/Clean up resources
部分代码
完整代码请参考文件【源码汇总 / 09.Scene / 01.ocr_det.py】
x# 自定义OCR检测类 / Custom OCR detection classclass OCRDetectionApp(AIBase): def __init__(self, kmodel_path, model_input_size, mask_threshold=0.5, box_threshold=0.2, rgb888p_size=[224, 224], display_size=[1920, 1080], debug_mode=0): """ 初始化OCR检测应用 Initialize OCR detection application 参数/Parameters: kmodel_path: 模型文件路径 / Path to the kmodel file model_input_size: 模型输入尺寸 / Input size for the model mask_threshold: 文本分割掩码阈值 / Threshold for text segmentation mask box_threshold: 文本框检测阈值 / Threshold for text box detection rgb888p_size: 摄像头输入尺寸 / Camera input resolution display_size: 显示分辨率 / Display resolution debug_mode: 调试模式级别 / Debug mode level """ super().__init__(kmodel_path, model_input_size, rgb888p_size, debug_mode) self.kmodel_path = kmodel_path # 模型输入分辨率 / Model input resolution self.model_input_size = model_input_size # 分类阈值 / Classification thresholds self.mask_threshold = mask_threshold # 掩码阈值 / Mask threshold self.box_threshold = box_threshold # 边框阈值 / Box threshold # sensor给到AI的图像分辨率 / Image resolution from sensor to AI # ALIGN_UP函数确保宽度是16的倍数 / ALIGN_UP function ensures width is a multiple of 16 self.rgb888p_size = [ALIGN_UP(rgb888p_size[0], 16), rgb888p_size[1]] # 显示分辨率 / Display resolution self.display_size = [ALIGN_UP(display_size[0], 16), display_size[1]] self.debug_mode = debug_mode # Ai2d实例,用于实现模型预处理 / Ai2d instance for model preprocessing self.ai2d = Ai2d(debug_mode) # 设置Ai2d的输入输出格式和类型 / Set input/output format and type for Ai2d # NCHW格式:[batch, channel, height, width] / NCHW format: [batch, channel, height, width] self.ai2d.set_ai2d_dtype(nn.ai2d_format.NCHW_FMT, nn.ai2d_format.NCHW_FMT, np.uint8, np.uint8) def config_preprocess(self, input_image_size=None): """ 配置预处理操作 Configure preprocessing operations 参数/Parameters: input_image_size: 可选的输入图像尺寸,默认使用rgb888p_size / Optional input image size, uses rgb888p_size by default """ with ScopedTiming("set preprocess config", self.debug_mode > 0): # 初始化ai2d预处理配置,默认为sensor给到AI的尺寸,可以通过设置input_image_size自行修改输入尺寸 # Initialize ai2d preprocessing configuration, default is the size from sensor to AI, # you can modify the input size by setting input_image_size ai2d_input_size = input_image_size if input_image_size else self.rgb888p_size # 获取padding参数 / Get padding parameters top, bottom, left, right = self.get_padding_param() # 设置padding / Set padding self.ai2d.pad([0, 0, 0, 0, top, bottom, left, right], 0, [0, 0, 0]) # 设置resize方法 / Set resize method self.ai2d.resize(nn.interp_method.tf_bilinear, nn.interp_mode.half_pixel) # 构建ai2d处理Pipeline / Build ai2d processing pipeline self.ai2d.build([1, 3, ai2d_input_size[1], ai2d_input_size[0]], [1, 3, self.model_input_size[1], self.model_input_size[0]]) def postprocess(self, results): """ 后处理函数,处理模型输出结果 Postprocessing function to handle model output results 参数/Parameters: results: 模型的原始输出 / Raw output from the model 返回/Returns: all_boxes_pos: 检测到的文本框坐标列表 / List of detected text box coordinates """ with ScopedTiming("postprocess", self.debug_mode > 0): # 将CHW格式转换为HWC格式 / Convert CHW format to HWC format hwc_array = self.chw2hwc(self.cur_img) # 使用aicube封装的接口ocr_post_process做后处理,返回文本框位置 # Use aicube's ocr_post_process interface for post-processing, returns text box positions # det_boxes结构为[[crop_array_nhwc, [p1_x, p1_y, p2_x, p2_y, p3_x, p3_y, p4_x, p4_y]], ...] # det_boxes structure: [[crop_array_nhwc, [p1_x, p1_y, p2_x, p2_y, p3_x, p3_y, p4_x, p4_y]], ...] det_boxes = aicube.ocr_post_process( results[0][:, :, :, 0].reshape(-1), # 取模型输出的第一个通道 / Take the first channel of model output hwc_array.reshape(-1), # 原始图像 / Original image self.model_input_size, # 模型输入尺寸 / Model input size self.rgb888p_size, # 原始图像尺寸 / Original image size self.mask_threshold, # 掩码阈值 / Mask threshold self.box_threshold # 边框阈值 / Box threshold ) # 提取所有文本框位置 / Extract all text box positions all_boxes_pos = [] for det_box in det_boxes: all_boxes_pos.append(det_box[1]) return all_boxes_pos def draw_result(self, pl, all_boxes_pos): """ 绘制检测结果 Draw detection results 参数/Parameters: pl: PipeLine实例 / PipeLine instance all_boxes_pos: 所有检测到的文本框位置 / All detected text box positions """ with ScopedTiming("display_draw", self.debug_mode > 0): # 清除OSD图像 / Clear OSD image pl.osd_img.clear() # 遍历所有检测到的文本框 / Iterate through all detected text boxes for i in range(len(all_boxes_pos)): # 一次绘制四条边,得到文本检测的四边形 / Draw four edges to get the quadrilateral of text detection for j in range(4): # 计算缩放后的坐标 / Calculate scaled coordinates # 当前点坐标 / Current point coordinates x1 = all_boxes_pos[i][2 * j] * self.display_size[0] // self.rgb888p_size[0] y1 = all_boxes_pos[i][2 * j + 1] * self.display_size[1] // self.rgb888p_size[1] # 下一个点坐标(循环到第一个点) / Next point coordinates (cycle back to the first point) x2 = all_boxes_pos[i][(2 * j + 2) % 8] * self.display_size[0] // self.rgb888p_size[0] y2 = all_boxes_pos[i][(2 * j + 3) % 8] * self.display_size[1] // self.rgb888p_size[1] # 绘制线段 / Draw line segment pl.osd_img.draw_line(int(x1), int(y1), int(x2), int(y2), color=(255, 255, 0, 0), thickness=4) def get_padding_param(self): """ 计算padding参数以保持图像比例 Calculate padding parameters to maintain image aspect ratio 返回/Returns: top, bottom, left, right: padding参数 / padding parameters """ # 目标尺寸 / Target dimensions dst_w = self.model_input_size[0] dst_h = self.model_input_size[1] # 输入尺寸 / Input dimensions input_width = self.rgb888p_size[0] input_high = self.rgb888p_size[1] # 计算宽高缩放比例 / Calculate width and height scaling ratios ratio_w = dst_w / input_width ratio_h = dst_h / input_high # 选择较小的比例以保证完整图像可见 / Choose the smaller ratio to ensure the entire image is visible if ratio_w < ratio_h: ratio = ratio_w else: ratio = ratio_h # 计算缩放后的新尺寸 / Calculate new dimensions after scaling new_w = (int)(ratio * input_width) new_h = (int)(ratio * input_high) # 计算需要填充的像素数 / Calculate the number of pixels to pad dw = (dst_w - new_w) / 2 dh = (dst_h - new_h) / 2 # 计算padding参数 / Calculate padding parameters # 这里设置top和left为0,只在bottom和right进行padding # Here, set top and left to 0, only pad at bottom and right top = (int)(round(0)) bottom = (int)(round(dh * 2 + 0.1)) left = (int)(round(0)) right = (int)(round(dw * 2 - 0.1)) return top, bottom, left, right def chw2hwc(self, features): """ 将CHW格式的数据转换为HWC格式 Convert data from CHW format to HWC format 参数/Parameters: features: CHW格式的数据 / Data in CHW format 返回/Returns: hwc_array: HWC格式的数据 / Data in HWC format """ # 获取原始形状 / Get original shape ori_shape = (features.shape[0], features.shape[1], features.shape[2]) # 将CHW reshape为C x (H*W) / Reshape CHW to C x (H*W) c_hw_ = features.reshape((ori_shape[0], ori_shape[1] * ori_shape[2])) # 转置为(H*W) x C / Transpose to (H*W) x C hw_c_ = c_hw_.transpose() # 创建新数组 / Create new array new_array = hw_c_.copy() # 重塑为HWC格式 / Reshape to HWC format hwc_array = new_array.reshape((ori_shape[1], ori_shape[2], ori_shape[0])) # 释放临时变量以节省内存 / Release temporary variables to save memory del c_hw_ del hw_c_ del new_array return hwc_array
人体检测算法简述
什么是OCR?
OCR (Optical Character Recognition,光学字符识别) 是一种AI技术,用于将图像中的文字转换成可编辑的数字文本。
主要功能包括:
- 识别印刷体文字
- 识别手写文字
- 处理多种语言文字
- 识别表格和文档结构
常见的应用场景
- 文档数字化
- 身份证、驾照等证件识别
- 发票和票据处理
- 名片信息提取
- 车牌识别