5.OpenCV像素操作
像素操作,我们可以给任意位置改成新的像素颜色,这里我们先读取图像,然后赋值一个区域为白色。
代码路径:
中文代码路径:
x
/home/jetson/Dofbot/4.opencv_CN/1.OpenCV入门/ 04_OpenCV像素操作.ipynb英文代码路径
x/home/jetson/Dofbot/4.opencv_EN/1.OpenCV_Getting_started/04_OpenCV_pixel_operation.ipynb
主要代码
ximport cv2
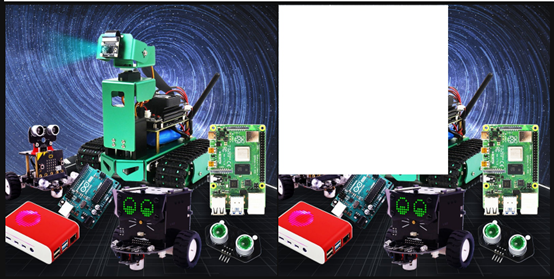
img = cv2.imread('yahboom.jpg',1)(b,g,r) = img[100,100]print(b,g,r)# bgr#10 100 --- 110 100i=j=0for j in range(1,500): img[i,j] = (255,255,255) for i in range(1,500): img[i,j] = (255,255,255)# cv2.imshow('image',img)# cv2.waitKey(0) #1000 msxxxxxxxxxx#bgr8转jpeg格式import enumimport cv2def bgr8_to_jpeg(value, quality=75): return bytes(cv2.imencode('.jpg', value)[1])JupyterLab显示前后图像对比:
xxxxxxxxxximport ipywidgets.widgets as widgetsimage_widget1 =   widgets.Image(format='jpg', )image_widget2 =   widgets.Image(format='jpg', )# create a horizontal box container   to place the image widget next to eachotherimage_container =   widgets.HBox([image_widget1, image_widget2])# display the container in this   cell's outputdisplay(image_container)img1 = cv2.imread('yahboom.jpg',1)image_widget1.value =   bgr8_to_jpeg(img1)  #原始的
image_widget2.value =   bgr8_to_jpeg(img)   #经过像素操作的
代码块运行完之后,可以对比看到第二张图已经有部分变成白色像素。