1、绘制图形
1.1、实验目标
本节课主要学习绘制图形功能,包含画线,画圆,画矩形。
本次实验的参考代码路径为:CanMV\04-GUI\geometric.py
1.2、实验过程
模块的出厂固件已经集成lcd和image模块,如果下载过其他固件,请烧录回出厂固件再进行实验。
- 导入lcd和image。
import lcd, image
- 初始化lcd和image,填充背景颜色为(0, 81, 137)
xxxxxxxxxxlcd.init()img = image.Image(size=(lcd.width(), lcd.height()))img.draw_rectangle((0, 0, lcd.width(), lcd.height()), fill=True, color=(0, 81, 137))
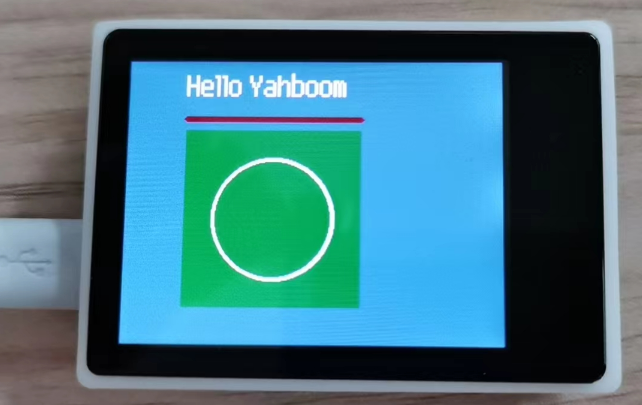
- 在(50,10)位置显示“Hello Yahboom”字符串,在(50,50)位置画线,在(50,60)位置画个矩形,在(125,135)位置画个圆。
xxxxxxxxxximg.draw_string(50, 10, "Hello Yahboom", color=(255, 255, 255), scale=2)img.draw_line(50, 50, 200, 50, color=(100, 0, 0), thickness=5)img.draw_rectangle(50, 60, 150, 150, color=(0, 100, 0), thickness=2, fill=True)img.draw_circle(125, 135, 50, color=(255, 255, 255), thickness=2, fill=False)
- 最后将img显示在LCD屏幕上。
xxxxxxxxxxlcd.display(img)
1.3、实验效果
将K210模块通过microUSB数据线连接到电脑上,CanMV IDE点击连接按钮,连接完成后点击运行按钮,运行例程代码。也可以将代码作为main.py下载到K210模块上运行。
可以看到LCD显示屏上显示“Hello Yahboom”字符串,还有一条线,一个矩形,一个圆。

1.4、实验总结
使用CanMV IDE,搭配出厂固件写好的MicroPython语法,可以非常方便绘制图形出来。